html+css implement picture upper right corner with delete fork, picture delete button.
2022-01-07 21:47:36
ちなみに、将来的に必要になった場合にも使えるかもしれません。
BBなし、まずは結果から
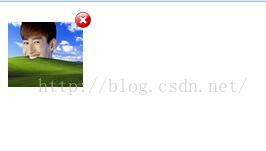
上記は効果画像です。右上の画像は、画像自体を変更することができ、画像素材は、私はアップしませんが、私はコードになります、非常に単純なCSSとJS、初心者はまた見ることができるはずです。
</pre><pre name="code" class="html"><!DOCTYPE html PUBLIC "-/W3C//DTD XHTML 1.0 Transitional//EN& quot; "http://www.w3.org/TR/xhtml1/DTD/xhtml1-transitional.dtd">
<html xmlns="http://www.w3.org/1999/xhtml">
<head>
<meta http-equiv="Content-Type" content="text/html; charset=utf-8" />
<title>Untitled document</title>
<style type="text/css">
.divX
{
    z-index:200;
    -moz-border-radius:20px;
    -webkit-border-radius:20px;
    line-height:10px;
    text-align:center;
    font-weight:bold;
    cursor:pointer;
    font-size:10px;
	display: none;
}
</style>
</head>

<body>
	<form id="form" style="margin-top:20px;">

        <div id="img_div_1">
            <input type="file" id="file_input" οnchange="addFile(this);" style="display:none" />
            <div style="position: relative;">
            	<img id="file_img" src="add_img.png" width="75" οnclick="file_input.click();" height=" 65" />
            </div>
            <div class="divX" id="img_zindex_div_1" οnclick="del()">
            	<img src="no.png" width="16" height="16" />
            </div>
        </div>

	</form>
</body>
<script src="jquery-1.7.2.js" type="text/javascript"></script>
<script type="text/javascript">

	function addFile(ths) {
		var objUrl = getObjectURL(ths.files[0]);
		var left = $('#file_img').position().left;
		var top = $('#file_img').position().top;
		$('#img_zindex_div_1').css({position: "absolute", left: left + 75, top: top + 10, display: "block" });
		$('#file_img').attr("src", objUrl);
	}

	function del() {
		alert("delete");
	}

	function getObjectURL(file) {
		var url = null ;
		if (window.createObjectURL!=undefined) { // basic
			url = window.createObjectURL(file) ;
		} else if (window.URL!=undefined) { // mozilla(firefox)
			url = window.URL.createObjectURL(file) ;
		} else if (window.webkitURL!=undefined) { // webkit or chrome
			url = window.webkitURL.createObjectURL(file) ;
		}
		return url ;
	}
</script>
</html>
完了しました。ラップアップしました。コードをコピーして、画像素材を入れ替えれば、すぐに動作します
オフザジョブです。さあ、行こうか。
------------------------------------------------------------------------------------------- gorgeous split ----------------------------------- ----------------------------------------------------------------------
追加です。takeleftが0なので
別の方法で
 var objUrl = getObjectURL(ths.files[0]);
		var left = $('#file_img').offset().left;
		var top = $('#file_img').offset().top;

		// left is the leftmost distance of the default image, after adding the image can be based on the width of the default image - the width of the deleted layer image (i.e.: the current width of my default image is 75, the width of the deleted layer image is 16, left = 75 - 16, the position will be to the far right of the image! top is also the same thing)
		$('#img_zindex_div_1').css({position: "absolute", left: left + 59, top: top - 5, display: "block" });
概要 <未定義
この記事は、html + cssの右上隅の画像プラス削除フォークを達成するために、画像の削除ボタンがこれに導入され、より関連するhtmlの画像右上隅プラス削除内容は、スクリプトの家の前の記事を検索するか、次の関連記事を閲覧し続け、あなたが将来的に多くのスクリプトハウスをサポートして願っています!。
関連
-
htmlページ間でパラメータを受け渡しするフロントエンド方式を解説
-
HTMLテーブルのマウスドラッグ&ドロップによる並べ替え機能
-
HTMLを使った簡単なメールテンプレートの作成
-
selectを読み取り専用で編集不可にし、selectの値を渡す設定にする方法
-
HTMLにおけるbaseタグの使い方を説明します。
-
ボタンで送信の種類が指定されておらず、ボタンをクリックしても指定されたURLにジャンプしない
-
htmlからpdfへの変換は、いくつかの要約の場合(より多くの画像をお勧めします)。
-
HTMLページ埋め込み動画、JSコントロールスイッチ動画例詳細
-
正しいHTML、CSS、RSSフィードを検証する無料ツール
-
htmlのReadOnlyとEnabledの違い
最新
-
nginxです。[emerg] 0.0.0.0:80 への bind() に失敗しました (98: アドレスは既に使用中です)
-
htmlページでギリシャ文字を使うには
-
ピュアhtml+cssでの要素読み込み効果
-
純粋なhtml + cssで五輪を実現するサンプルコード
-
ナビゲーションバー・ドロップダウンメニューのHTML+CSSサンプルコード
-
タイピング効果を実現するピュアhtml+css
-
htmlの選択ボックスのプレースホルダー作成に関する質問
-
html css3 伸縮しない 画像表示効果
-
トップナビゲーションバーメニュー作成用HTML+CSS
-
html+css 実装 サイバーパンク風ボタン