opencvとpillowを用いた顔認証システム(デモあり)
この記事では、分類器や学習認識器などのアルゴリズムの原理は取り上げず、その応用のみを紹介します(今後、機械学習アルゴリズムの原理に対する私自身の見解や理解についても書いていく予定です)。
まずは、既存のフレームワークを使って顔認識システムを作ることは難しくないということを知っていただき、システム開発をスタートさせましょう。
私たちのシステムは大きく3つのパートに分かれていますが、その上で、撮影した画像に中国語を付加できないことに対する解決策も提案します。私たちが達成しなければならない課題 1. 顔検出とデータ収集 2. 認識器のトレーニング 3. 顔認識と表示
この記事を読む前に、python環境の導入とopencvモジュールのダウンロードとインストールは既に済んでいると思いますが、ここでモジュールpillowも必要です(Raspberry Piにはデフォルトで入っていますが、Winシステムをお使いの場合は別途インストールが必要かもしれません。opencv- contrib モジュール、cv2 の face モジュールが含まれています(もちろん、私の Linux Raspberry Pi にはこのモジュールがデフォルトで含まれているようなので、PC を使用している場合は別途ダウンロードする必要があるかもしれません)、そして最も基本的な numpy モジュールも含まれています。
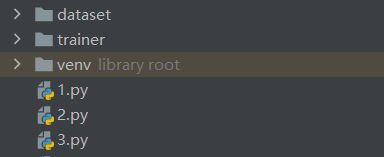
これは、後で認識器を学習させるためにキャプチャした顔画像を保存するためのdatasetと、学習結果を保存するためのtrainerフォルダです。
I. 顔検出とデータ収集
#data capture
cam = cv2.VideoCapture(0) # capture image
cam.set(3, 640) # set video width
cam.set(4, 480) # set video height
face_detector = cv2.CascadeClassifier('haarcascade_frontalface_default.xml') # import classifier
# For each person, enter one numeric face id
face_id = input('\n input user id')
print("\n data collection in progress, please look at the camera slightly twisted")
# Initialize individual sampling face count
count = 0
while(True):
 ret, img = cam.read() # ret is whether the read was successful, it is a boolean value
 gray = cv2.cvtColor(img, cv2.COLOR_BGR2GRAY)# Convert to grayscale
 faces = face_detector.detectMultiScale(gray, 1.3, 5,minSize=(100,100))
 for (x,y,w,h) in faces:# here faces is an array array or an empty tuple, for reasons I will analyze later
  cv2.rectangle(img, (x,y), (x+w,y+h), (255,0,0), 2)
  count += 1
 # Save the captured image into the datasets folder
  cv2.imwrite("dataset/User." + str(face_id) + '.' + str(count) + ".jpg", gray[y:y+h,x:x+w])
 cv2.imshow('image', img)
 k = cv2.waitKey(100) & 0xff # Press 'ESC' for exiting video
 if k == 27:
  break
 elif count >= 10: # Take 10 face sample and stop video
  break
# Do a bit of cleanup
print("\n [INFO] Exiting Program and cleanup stuff")
cam.release()
cv2.destroyAllWindows()
このパートでは、顔の取得を終了し、作成したデータセットフォルダに保存します。また、異なる顔を認識できる認識器を訓練できるように、各人のデータを特定のIDで表現します。 cam.set このステップの2番目のパラメータは画像の解像度です。640×480はopencvのデフォルト解像度ですが、800×600もサポートし、最大1280×1024ピクセルに対応しており、カメラの最大許容解像度がこの値よりはるかに大きくても、opencvではまだ使うことが出来ないようです。この後はhaar cascade分類器のインポートです。設定プロセスでは、opencvに付属する分類器をダウンロードしました。ファイルマネージャでhaarcascade_frontalface_default.xmlというファイルを見つけるだけです。このファイルがあるフォルダには多くの分類器があります。もちろんリンゴなどのオブジェクトを識別したい場合 バナナなどのオブジェクトを認識したい場合は新しい分類器のトレーニング(これも簡単にできます)が必要かもしれません。この記事は顔認識についてなのでここでは割愛させてもらいます。次にループに入り、画像をread->してグレースケールにし、インポートした分類器を使って顔を認識して箱でマークし、箱の中の画像をデータセットフォルダに格納することです。特筆すべきは、分類器のアルゴリズムが遅いので、分類器自体がフレームリダクションをしている(それでも顔認識システムを搭載した私のRaspberry Piは苦労しています)ので、FECKSはほとんどの時間空のタプル、配列は少量で読めるはずなので、インデントの問題や分類器自体のフレームリダクションが動画の読み込みフレーム数、表示フレーム数に影響しないように特に気をつける必要があることです。
II. 認識器のトレーニング
import cv2
#trainer
import numpy as np
from PIL import Image
import os
# Path for face image database
path = 'dataset'
recognizer = cv2.face.LBPHFaceRecognizer_create() # Import of recognizer
detector = cv2.CascadeClassifier("haarcascade_frontalface_default.xml")
# function to get the images and label data
def getImagesAndLabels(path):
 imagePaths = [os.path.join(path,f) for f in os.listdir(path)]# here os module can help us to build paths very well, it is recommended to check the usage of related functions first.
 faceSamples = []
 ids = []
 for imagePath in imagePaths:
  PIL_img = Image.open(imagePath).convert('L') # convert to grayscale
  img_numpy = np.array(PIL_img,'uint8')# convert to array
  id = int(os.path.split(imagePath)[-1].split(". ")[1])
  faces = detector.detectMultiScale(img_numpy)
  for (x,y,w,h) in faces:
   faceSamples.append(img_numpy[y:y+h,x:x+w])
   ids.append(id)
 return faceSamples,ids
print ("\n training data in, please wait")
faces,ids = getImagesAndLabels(path)
recognizer.train(faces, np.array(ids))
# Save the model into trainer/trainer.yml
recognizer.write('trainer/trainer.yml') # recognizer.save() worked on Mac, but not on Pi
# Print the numer of faces trained and end program
print("\n {0} faces trained. Program closed".format(len(np.unique(ids))))
このステップでは、認識器をidごとに分けて学習させ、その結果を保存し、trainer.ymlというtrainerフォルダに結果のサマリーを書き込む必要があります。このファイルには、学習された認識器が含まれています。
III. 顔認識と表示
# -*- coding: UTF-8 -*-
# recognizer
import cv2
import numpy as np
import os
from PIL import Image, ImageFont, ImageDraw
path_to_ttf = 'C:\Windows\Fonts\Microsoft YaHei UI\msyh.ttc'#ttc file is the font that supports Chinese, I will explain later.
font1= ImageFont.truetype(path_to_ttf, size=20)
recognizer = cv2.face.LBPHFaceRecognizer_create()
recognizer.read('trainer/trainer.yml')#read recognizer
cascadePath = "haarcascade_frontalface_default.xml"
faceCascade = cv2.CascadeClassifier(cascadePath);
font = cv2.FONT_HERSHEY_SIMPLEX
#iniciate id counter
id = 0
# names related to ids: example ==> Marcelo: id=1, etc
names = ['None', 'Duan Lin Chen', 'Paula', 'Ilza', 'Z', 'W']#because we won't just show your code name in face recognition but your specific information.
cam = cv2.VideoCapture(0)
cam.set(3, 640) # set video widht
cam.set(4, 480) # set video height
# minimum recognized face size, during recognition we don't capture information about passersby on the street that are far away from you, which can cause a lot of problems, so we only need to recognize people who want to participate in the recognition, and setting the minimum face recognition size can circumvent this
minW = 0.1*cam.get(3)
minH = 0.1*cam.get(4)
while True:
 ret, img = cam.read()
 gray = cv2.cvtColor(img,cv2.COLOR_BGR2GRAY)
 faces = faceCascade.detectMultiScale(
 gray,
 scaleFactor = 1.2,
 minNeighbors = 5,
 minSize = (int(minW), int(minH)),
 ) # Related parameters can be set by searching
 for(x,y,w,h) in faces:
  cv2.rectangle(img, (x,y), (x+w,y+h), (0,255,0), 2)
  id, confidence = recognizer.predict(gray[y:y+h,x:x+w])
 # Check if confidence is less them 100 == > "0" is perfect match
  if (confidence < 100):
   id = names[id]
   confidence = " {0}%".format(round(100 - confidence))# confidence is the confidence index, equal to 100 - probability, I believe that everyone's probability statistics must be better than mine
  else:
   id = "unidentified"
   confidence = " {0}%".format(round(100 - confidence))
  img = Image.fromarray(img)
  draw = ImageDraw.Draw(img)
  draw.text(xy=(x+5,y-5), text=str(id), font=font1,fill=(255,255,255))
  img=np.array(img)
  cv2.putText(img, str(confidence), (x+5,y+h-5), font, 1, (255,255,0), 1)
 cv2.imshow('camera',img)
 k = cv2.waitKey(10) & 0xff # Press 'ESC' for exiting video
 if k == 27:
  break
# Do a bit of cleanup
print("\n [INFO] Exiting Program and cleanup stuff")
cam.release()
cv2.destroyAllWindows()
このステップでは、残念ながら cv2.putText 関数が中国語のアプリケーションをサポートしていません。つまり、英語名や単に羽生ピンインを使うことはあっても、この関数で中国語名を動画内に表示することはできません。そこで、pillowモジュールを導入し、img.draw関数を使って、まず画像に名前を入力し、次にcv2.putText関数でこの問題をうまく解決します。しかし、もっと面倒なのは、この二つの関数には異なるタイプの画像が含まれていることです。そこで、コード内でimgと配列画像を変換し、ようやく顔認識システムが完成しました。
opencvとpillowを使った顔認識システム(デモあり)については、この記事が全てです。その他のopencv pillow顔認識関連のコンテンツは、Script Houseの過去記事を検索するか、以下の関連記事を引き続きご覧ください。
関連
-
[解決済み】ValueError: xとyは同じサイズでなければならない
-
[解決済み】python "TypeError: 'numpy.float64' object cannot be interpreted as an integer" (タイプエラー: 'numpy.float64' オブジェクトは整数として解釈できません)。
-
python extract audio from video tool クラス詳細
-
[解決済み] Django CSRF クッキーが設定されていない
-
[解決済み] カウンターを値で並べ替えるには?- パイソン
-
[解決済み] help(foo)のように、Pythonのメソッドシグネチャにあるフォワードスラッシュ「/」の意味を教えてください。重複] [重複] [重複] [重複
-
[解決済み] データフレーム全体に対するpandas.factorize
-
[解決済み] Pythonで複数行のdictをフォーマットする適切な方法は何ですか?
-
[解決済み] 2文字列間の削除距離
-
SyntaxError: 無効な構文が問題なのでしょう。(継続的に更新されます)
最新
-
nginxです。[emerg] 0.0.0.0:80 への bind() に失敗しました (98: アドレスは既に使用中です)
-
htmlページでギリシャ文字を使うには
-
ピュアhtml+cssでの要素読み込み効果
-
純粋なhtml + cssで五輪を実現するサンプルコード
-
ナビゲーションバー・ドロップダウンメニューのHTML+CSSサンプルコード
-
タイピング効果を実現するピュアhtml+css
-
htmlの選択ボックスのプレースホルダー作成に関する質問
-
html css3 伸縮しない 画像表示効果
-
トップナビゲーションバーメニュー作成用HTML+CSS
-
html+css 実装 サイバーパンク風ボタン
おすすめ
-
[解決済み】「'float'オブジェクトを暗黙のうちにstrに変換できない」【重複あり
-
[解決済み] Flaskアプリを実行しようとすると、"Address already in use "と表示される。
-
[解決済み] ctypes error: libdc1394 error: libdc1394 の初期化に失敗しました。
-
[解決済み] PythonでXMLをきれいに印刷する
-
[解決済み] Python socket.error: [Errno 111] 接続が拒否されました
-
[解決済み] django 変数をグローバルに使用する方法
-
Pyinstaller を使って Python プログラムをパッケージングしてみる 発生した問題のまとめ
-
PackagesNotFoundError: 次のパッケージは、現在のチャンネルから利用できません ソリューション
-
サポートされていないオペランド型 +: 'NoneType' および 'int'
-
ValueError: 解凍する値が多すぎる (期待値 2)