CentOS 8.4へのRedis 6.2.6の詳細なインストール方法
I. ダウンロード
公式サイト レディス 私たちは、安定した安定版をダウンロードする
# cd /mydata
# wget https://download.redis.io/releases/redis-6.2.6.tar.gz
II. redis 6.2.6 のインストール
1. usr/local/redis6.2.6/ディレクトリにインストールします。
# cd /mydata/
# tar -zxvf redis-6.2.6.tar.gz -C /usr/local/ //Unzip directly to the /usr/local/ directory

# cd /usr/local/redis-6.2.6
# make
About 5 minutes and finally make[1]: Leaving directory '/usr/local/redis-6.2.6/src'

# make install // add the files in this . /src directory to the /usr/local/bin directory
Finally it appears.
Hint: It's a good idea to run 'make test' ;)
    INSTALL redis-server
    INSTALL redis-benchmark
    INSTALL redis-cli
make[1]: Leaving directory '/usr/local/redis-6.2.6/src'
OK Compile successfully
# ls -al /usr/local/bin/ There are already redis-related files in there
makeがエラーを出す場合は、gccがインストールされているかどうか確認してください。インストールされていない場合は、yum -y install gcc gcc-c++ で gcc をインストールします。
注:上記で直接実行した # make install は、デフォルトで redis の実行ビンを /usr/local/bin/ にインストールします。指定したい場合は、# make install PREFIX=/opt/redis-6.2.6 とします。
redisクライアント関連のツールは、/usr/local/redis-6.2.6/srcディレクトリにあり、ここで
. /redis-server サーバー側起動ツール
. /redis-cli クライアントサイド起動ツール
2. インストールに成功したかどうか確認する
# cd /usr/local/redis-6.2.6/src
# . /redis-server
次のような画像が表示されます。
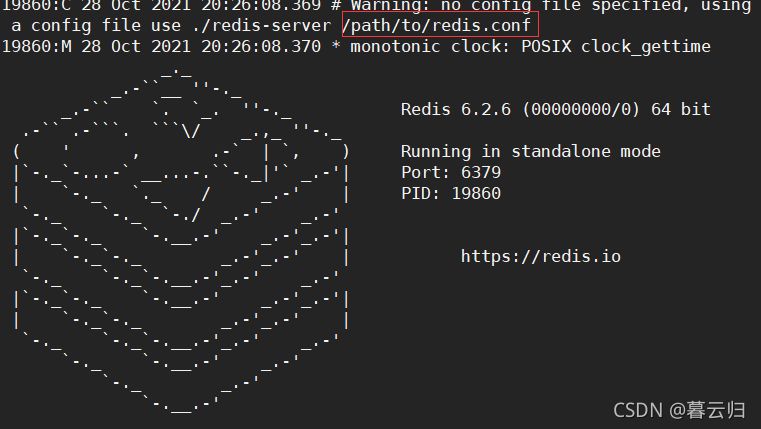
正常にインストールされたことを意味し、ctrl+cで終了します。
設定ファイル redis.conf は /usr/local/redis-6.2.6/ ディレクトリにあります。
III. redisサーバーの設定
1. バックグラウンドで起動するように設定する
# vim /usr/local/redis-6.2.6/redis.conf
About 257 lines (may vary by version)
daemonize no change value to yes start with daemon save exit
2. 起動するredis.confファイルを指定する
#cd /usr/local/redis-6.2.6/src/
# . /redis-server ... /redis.conf // temporarily start the server, (if the configuration file is not modified in the previous step, adding a & here also means background start)
To test.
# . /redis-cli
127.0.0.1:6379> set username 'zhangsan'
OK means it started successfully
127.0.0.1:6379> get username
"zhangsan"
127.0.0.1:6379> exit exit
IV. 自己起動をオンにする設定
redisサービスプロセスのシャットダウン
# ps -aux | grep redis // view redis processes
root 4822 0.0 0.7 153892 7640 ?        ssl 19:33 0:00 . /src/redis-server 127.0.0.1:6379
root 5557 0.0 0.0 112708 972 pts/0 R+ 19:41 0:00 grep --color=auto redis
Use the kill -9 command to kill this process
# kill -9 4822
# kill -9 5557

# delete this process file (if any)
# rm -f /var/run/redis_6379.pid # This file will exist as long as it has been started
# netstat -nlpt to see if port number 6379 still exists
ブートリブートを設定する
# cd /usr/local/redis-6.2.6/
# mkdir /etc/redis // Create a new redis directory in the /etc directory
# cp . /redis.conf /etc/redis/6379.conf
# cp . /utils/redis_init_script /etc/init.d/redisd // copy the redis startup script to /etc/init.d and rename it to redisd

# cd /etc/init.d/
# chkconfig --add redisd # Add to bootup
# chkconfig redisd on

# Start the redis server
# service redisd start
Starting Redis server...   OK redis started successfully

# execute anywhere
# redis-cli
You can enter
# service redisd stop Shut down redis service
OK サーバを再起動すると、redis サーバが自動的にオンになります。注意: /etc/redis/6379.conf を以下のように変更することもできます (ここでは変更しません)。
ログファイル "/var/log/redis/6379.log"
# ログファイルの保存先を設定する dir
/var/lib/redis/6379
# データが保存されるパスの設定
V. redisのアンインストール
# chkconfig redisd off
# service redisd stop shut down redis service
# find / -name redis
# rm -rf redis-6.2.6/
# rm -rf /etc/redis/
# rm -rf /etc/init.d/redisd
# rm -rf /var/lib/selinux/targeted/active/modules/100/redis
# rm -rf /usr/share/selinux/targeted/default/active/modules/100/redis
以上、CentOS8.4にRedis6.2.6をインストールする方法についてご紹介しました。Redis 6.2.6のCentOS 8.4へのインストールについては、Scripting Houseの過去記事を検索いただくか、引き続き以下の記事をご覧ください。
関連
最新
-
nginxです。[emerg] 0.0.0.0:80 への bind() に失敗しました (98: アドレスは既に使用中です)
-
htmlページでギリシャ文字を使うには
-
ピュアhtml+cssでの要素読み込み効果
-
純粋なhtml + cssで五輪を実現するサンプルコード
-
ナビゲーションバー・ドロップダウンメニューのHTML+CSSサンプルコード
-
タイピング効果を実現するピュアhtml+css
-
htmlの選択ボックスのプレースホルダー作成に関する質問
-
html css3 伸縮しない 画像表示効果
-
トップナビゲーションバーメニュー作成用HTML+CSS
-
html+css 実装 サイバーパンク風ボタン