[解決済み] HTML5 Canvas Resize (Downscale) Image High Quality?
質問
html5のcanvas要素を使って、ブラウザで画像のリサイズをしています。その結果、品質が非常に低いことがわかりました。私はこれを見つけた。 キャンバスの拡大縮小時の補間を無効にする。 が、画質の向上にはつながらない。
以下は、私のCSSとJSのコードと、Photoshopでスケーリングした画像をcanvas APIでスケーリングしたものです。
ブラウザで画像を拡大縮小する際に、最適な画質を得るためにはどうしたらよいですか?
注:大きな画像を小さな画像に縮小し、キャンバスで色を変更し、キャンバスからサーバーに結果を送りたいのです。
CSSを使用します。
canvas, img {
    image-rendering: optimizeQuality;
    image-rendering: -moz-crisp-edges;
    image-rendering: -webkit-optimize-contrast;
    image-rendering: optimize-contrast;
    -ms-interpolation-mode: nearest-neighbor;
}
JSです。
var $img = $('<img>');
var $originalCanvas = $('<canvas>');
$img.load(function() {


   var originalContext = $originalCanvas[0].getContext('2d');
   originalContext.imageSmoothingEnabled = false;
   originalContext.webkitImageSmoothingEnabled = false;
   originalContext.mozImageSmoothingEnabled = false;
   originalContext.drawImage(this, 0, 0, 379, 500);
});
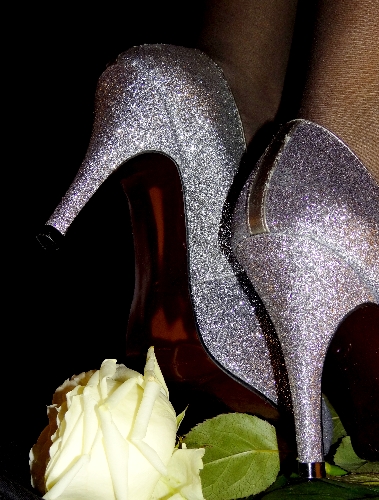
photoshopでリサイズした画像です。

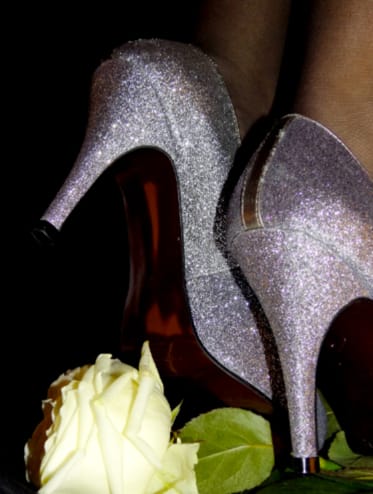
キャンバス上でリサイズされた画像。
編集する
で提案されているように、ダウンスケールを2段階以上にしてみました。
HTML5キャンバスの画像サイズを変更する と Html5 canvas drawImage: アンチエイリアスのかけ方
これは私が使用した関数です。
function resizeCanvasImage(img, canvas, maxWidth, maxHeight) {
    var imgWidth = img.width,
        imgHeight = img.height;

    var ratio = 1, ratio1 = 1, ratio2 = 1;
    ratio1 = maxWidth / imgWidth;
    ratio2 = maxHeight / imgHeight;

    // Use the smallest ratio that the image best fit into the maxWidth x maxHeight box.
    if (ratio1 < ratio2) {
        ratio = ratio1;
    }
    else {
        ratio = ratio2;
    }

    var canvasContext = canvas.getContext("2d");
    var canvasCopy = document.createElement("canvas");
    var copyContext = canvasCopy.getContext("2d");
    var canvasCopy2 = document.createElement("canvas");
    var copyContext2 = canvasCopy2.getContext("2d");
    canvasCopy.width = imgWidth;
    canvasCopy.height = imgHeight;
    copyContext.drawImage(img, 0, 0);

    // init
    canvasCopy2.width = imgWidth;
    canvasCopy2.height = imgHeight;
    copyContext2.drawImage(canvasCopy, 0, 0, canvasCopy.width, canvasCopy.height, 0, 0, canvasCopy2.width, canvasCopy2.height);


    var rounds = 2;
    var roundRatio = ratio * rounds;
    for (var i = 1; i <= rounds; i++) {
        console.log("Step: "+i);

        // tmp
        canvasCopy.width = imgWidth * roundRatio / i;
        canvasCopy.height = imgHeight * roundRatio / i;

        copyContext.drawImage(canvasCopy2, 0, 0, canvasCopy2.width, canvasCopy2.height, 0, 0, canvasCopy.width, canvasCopy.height);

        // copy back
        canvasCopy2.width = imgWidth * roundRatio / i;
        canvasCopy2.height = imgHeight * roundRatio / i;
        copyContext2.drawImage(canvasCopy, 0, 0, canvasCopy.width, canvasCopy.height, 0, 0, canvasCopy2.width, canvasCopy2.height);

    } // end for


    // copy back to canvas
    canvas.width = imgWidth * roundRatio / rounds;
    canvas.height = imgHeight * roundRatio / rounds;
    canvasContext.drawImage(canvasCopy2, 0, 0, canvasCopy2.width, canvasCopy2.height, 0, 0, canvas.width, canvas.height);


}
2段階ダウンサイジングを行った場合の結果は以下の通りです。

3段階のダウンサイジングを行った場合の結果は以下の通りです。
4ステップダウンサイジングを使用した場合の結果は以下の通りです。
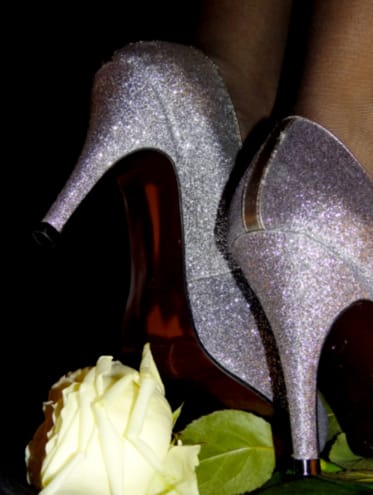
20ステップダウンサイジングを使用した場合の結果は以下の通りです。

注:1ステップから2ステップまでは画質が大きく向上するが、ステップ数を増やすと画像がぼやけることが判明した。
ステップ数を増やすほど画像がぼやける問題を解決する方法はありますか?
2013-10-04を編集。GameAlchemistのアルゴリズムを試してみました。Photoshopと比較した結果は以下の通りです。
PhotoShopの画像。

GameAlchemist's Algorithm(ゲームアルケミスト・アルゴリズム)。

解決方法は?
あなたの問題は画像のダウンスケールなので、補間(ピクセルを作成すること)について話す意味はないでしょう。ここで問題なのは、ダウンサンプリングです。
画像をダウンサンプリングするには、元画像のp * pピクセルの各正方形を、出力画像の1ピクセルに変換する必要があります。
性能上の理由から、ブラウザは非常に単純なダウンサンプリングを行います:小さい画像を作るために、彼らはただソースの1つのピクセルを選び、その値を目的地に使います。
2倍画像のダウンサンプリングは計算が非常に簡単で(平均4ピクセルで1つになる)、網膜/高DPIピクセルに使用されるため、このケースは適切に処理されます - ブラウザは4ピクセルで1つになります。
しかし、2倍のダウンサンプリングを何度も行うと、丸め誤差が連続して発生し、ノイズが多くなるという問題に直面します。
さらに悪いことに、常に2の累乗でリサイズするわけではないので、最も近い累乗へのリサイズ+最後のリサイズは非常にノイジーです。
つまり、すべての入力ピクセルを考慮した画像の再サンプリングです(スケールがどうであれ)。
そのためには、各入力ピクセルについて、入力ピクセルの拡大投影が出力ピクセルのすぐ内側にあるか、Xボーダー、Yボーダー、またはその両方に重なるかによって、1、2、または4つの出力ピクセルへの寄与を計算する必要があります。
(スキームがあればいいのですが、ないんです。)
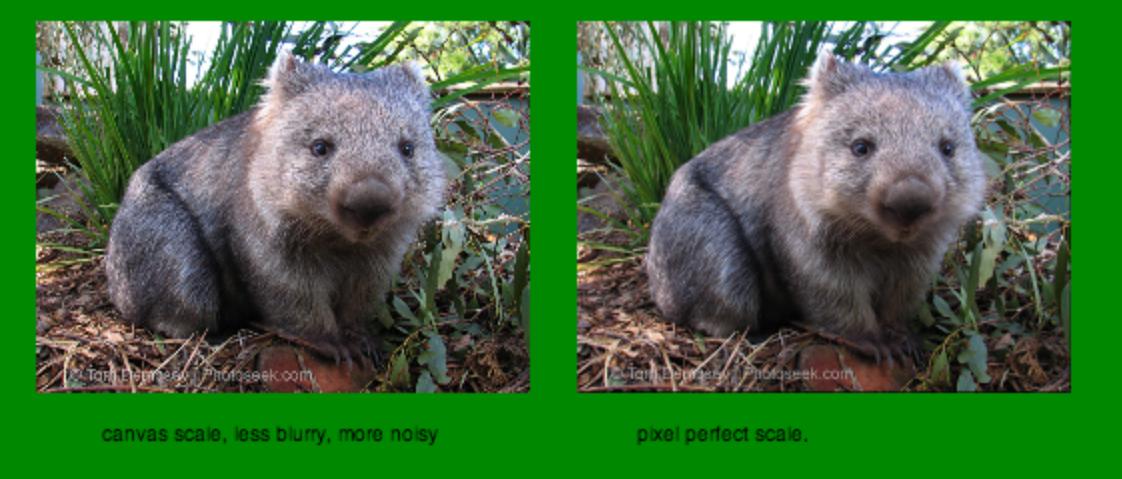
キャンバスのスケールと私のピクセルパーフェクトなスケールを1/3のゾンビのスケールで比較した例です。
画像はブラウザで拡大縮小され、S.O.で.jpeg化される可能性があることに注意してください。
しかし、ウォンバットの後ろの草むらや右側の枝には、特にノイズが少ないことがわかります。毛並みにノイズがある分、コントラストが強くなっていますが、ソース画像とは違い、白い毛が生えているように見えます。
右の画像の方がキャッチーさはないが、断然素敵だ。
以下は、ピクセルパーフェクトダウンスケーリングを行うコードです。
操作結果 :
http://jsfiddle.net/gamealchemist/r6aVp/embedded/result/
フィドルそのもの:
http://jsfiddle.net/gamealchemist/r6aVp/
// scales the image by (float) scale < 1
// returns a canvas containing the scaled image.
function downScaleImage(img, scale) {
    var imgCV = document.createElement('canvas');
    imgCV.width = img.width;
    imgCV.height = img.height;
    var imgCtx = imgCV.getContext('2d');
    imgCtx.drawImage(img, 0, 0);
    return downScaleCanvas(imgCV, scale);
}

// scales the canvas by (float) scale < 1
// returns a new canvas containing the scaled image.
function downScaleCanvas(cv, scale) {
    if (!(scale < 1) || !(scale > 0)) throw ('scale must be a positive number <1 ');
    var sqScale = scale * scale; // square scale = area of source pixel within target
    var sw = cv.width; // source image width
    var sh = cv.height; // source image height
    var tw = Math.floor(sw * scale); // target image width
    var th = Math.floor(sh * scale); // target image height
    var sx = 0, sy = 0, sIndex = 0; // source x,y, index within source array
    var tx = 0, ty = 0, yIndex = 0, tIndex = 0; // target x,y, x,y index within target array
    var tX = 0, tY = 0; // rounded tx, ty
    var w = 0, nw = 0, wx = 0, nwx = 0, wy = 0, nwy = 0; // weight / next weight x / y
    // weight is weight of current source point within target.
    // next weight is weight of current source point within next target's point.
    var crossX = false; // does scaled px cross its current px right border ?
    var crossY = false; // does scaled px cross its current px bottom border ?
    var sBuffer = cv.getContext('2d').
    getImageData(0, 0, sw, sh).data; // source buffer 8 bit rgba
    var tBuffer = new Float32Array(3 * tw * th); // target buffer Float32 rgb
    var sR = 0, sG = 0,  sB = 0; // source's current point r,g,b
    /* untested !
    var sA = 0;  //source alpha  */

    for (sy = 0; sy < sh; sy++) {
        ty = sy * scale; // y src position within target
        tY = 0 | ty;     // rounded : target pixel's y
        yIndex = 3 * tY * tw;  // line index within target array
        crossY = (tY != (0 | ty + scale));
        if (crossY) { // if pixel is crossing botton target pixel
            wy = (tY + 1 - ty); // weight of point within target pixel
            nwy = (ty + scale - tY - 1); // ... within y+1 target pixel
        }
        for (sx = 0; sx < sw; sx++, sIndex += 4) {
            tx = sx * scale; // x src position within target
            tX = 0 |  tx;    // rounded : target pixel's x
            tIndex = yIndex + tX * 3; // target pixel index within target array
            crossX = (tX != (0 | tx + scale));
            if (crossX) { // if pixel is crossing target pixel's right
                wx = (tX + 1 - tx); // weight of point within target pixel
                nwx = (tx + scale - tX - 1); // ... within x+1 target pixel
            }
            sR = sBuffer[sIndex    ];   // retrieving r,g,b for curr src px.
            sG = sBuffer[sIndex + 1];
            sB = sBuffer[sIndex + 2];

            /* !! untested : handling alpha !!
               sA = sBuffer[sIndex + 3];
               if (!sA) continue;
               if (sA != 0xFF) {
                   sR = (sR * sA) >> 8;  // or use /256 instead ??
                   sG = (sG * sA) >> 8;
                   sB = (sB * sA) >> 8;
               }
            */
            if (!crossX && !crossY) { // pixel does not cross
                // just add components weighted by squared scale.
                tBuffer[tIndex    ] += sR * sqScale;
                tBuffer[tIndex + 1] += sG * sqScale;
                tBuffer[tIndex + 2] += sB * sqScale;
            } else if (crossX && !crossY) { // cross on X only
                w = wx * scale;
                // add weighted component for current px
                tBuffer[tIndex    ] += sR * w;
                tBuffer[tIndex + 1] += sG * w;
                tBuffer[tIndex + 2] += sB * w;
                // add weighted component for next (tX+1) px
                nw = nwx * scale
                tBuffer[tIndex + 3] += sR * nw;
                tBuffer[tIndex + 4] += sG * nw;
                tBuffer[tIndex + 5] += sB * nw;
            } else if (crossY && !crossX) { // cross on Y only
                w = wy * scale;
                // add weighted component for current px
                tBuffer[tIndex    ] += sR * w;
                tBuffer[tIndex + 1] += sG * w;
                tBuffer[tIndex + 2] += sB * w;
                // add weighted component for next (tY+1) px
                nw = nwy * scale
                tBuffer[tIndex + 3 * tw    ] += sR * nw;
                tBuffer[tIndex + 3 * tw + 1] += sG * nw;
                tBuffer[tIndex + 3 * tw + 2] += sB * nw;
            } else { // crosses both x and y : four target points involved
                // add weighted component for current px
                w = wx * wy;
                tBuffer[tIndex    ] += sR * w;
                tBuffer[tIndex + 1] += sG * w;
                tBuffer[tIndex + 2] += sB * w;
                // for tX + 1; tY px
                nw = nwx * wy;
                tBuffer[tIndex + 3] += sR * nw;
                tBuffer[tIndex + 4] += sG * nw;
                tBuffer[tIndex + 5] += sB * nw;
                // for tX ; tY + 1 px
                nw = wx * nwy;
                tBuffer[tIndex + 3 * tw    ] += sR * nw;
                tBuffer[tIndex + 3 * tw + 1] += sG * nw;
                tBuffer[tIndex + 3 * tw + 2] += sB * nw;
                // for tX + 1 ; tY +1 px
                nw = nwx * nwy;
                tBuffer[tIndex + 3 * tw + 3] += sR * nw;
                tBuffer[tIndex + 3 * tw + 4] += sG * nw;
                tBuffer[tIndex + 3 * tw + 5] += sB * nw;
            }
        } // end for sx
    } // end for sy

    // create result canvas
    var resCV = document.createElement('canvas');
    resCV.width = tw;
    resCV.height = th;
    var resCtx = resCV.getContext('2d');
    var imgRes = resCtx.getImageData(0, 0, tw, th);
    var tByteBuffer = imgRes.data;
    // convert float32 array into a UInt8Clamped Array
    var pxIndex = 0; //
    for (sIndex = 0, tIndex = 0; pxIndex < tw * th; sIndex += 3, tIndex += 4, pxIndex++) {
        tByteBuffer[tIndex] = Math.ceil(tBuffer[sIndex]);
        tByteBuffer[tIndex + 1] = Math.ceil(tBuffer[sIndex + 1]);
        tByteBuffer[tIndex + 2] = Math.ceil(tBuffer[sIndex + 2]);
        tByteBuffer[tIndex + 3] = 255;
    }
    // writing result to canvas.
    resCtx.putImageData(imgRes, 0, 0);
    return resCV;
}
それは
かなり
出力画像の中間値を格納するために float バッファが必要なため、メモリを多く消費します(結果の canvas をカウントすると、このアルゴリズムではソース画像の 6 倍のメモリを使用します)。
また、各ソースピクセルは、宛先サイズに関係なく使用されるため、非常に高価であり、我々はgetImageData / putImageDateに支払わなければならず、かなり遅いもあります。
しかし、この場合、各ソース値を処理するよりも速くする方法はありませんし、状況はそれほど悪くありません:私のウォンバットの740 * 556画像では、処理は30〜40ミリ秒かかります。
関連
-
親子コンポーネント通信を解決する3つのVueスロット
-
Vue Element-uiは、アイコンを追加するためのツリーコントロールノードを詳細に実装しています。
-
[解決済み] テスト
-
[解決済み】JavaScriptエラー(Uncaught SyntaxError: Unexpected end of input)
-
[解決済み] HTML5 canvas をウィンドウに合わせてリサイズする
-
JSクリックイベント - Uncaught TypeError: プロパティ 'onclick' に null を設定できません。
-
[解決済み] div' コンテナに合わせて画像を自動リサイズするにはどうしたらいいですか?
-
[解決済み] HTML5/Canvas/JavaScriptを使用してブラウザ内のスクリーンショットを撮影する
-
[解決済み] HTML5 CanvasとSVGとdivの比較
-
[解決済み】HTML5キャンバスの画像サイズを変更する
最新
-
nginxです。[emerg] 0.0.0.0:80 への bind() に失敗しました (98: アドレスは既に使用中です)
-
htmlページでギリシャ文字を使うには
-
ピュアhtml+cssでの要素読み込み効果
-
純粋なhtml + cssで五輪を実現するサンプルコード
-
ナビゲーションバー・ドロップダウンメニューのHTML+CSSサンプルコード
-
タイピング効果を実現するピュアhtml+css
-
htmlの選択ボックスのプレースホルダー作成に関する質問
-
html css3 伸縮しない 画像表示効果
-
トップナビゲーションバーメニュー作成用HTML+CSS
-
html+css 実装 サイバーパンク風ボタン
おすすめ
-
Vueがechartsのtooltipにクリックイベントを追加するケーススタディ
-
jsを使った簡単な照明スイッチのコード
-
元のイベントが実行されなかった後に要素を追加するためのjQueryソリューション
-
[解決済み】ローカルファイルを開くことができません - Chrome: ローカルリソースの読み込みが許可されていない
-
[解決済み】リソースの読み込みに失敗した:Bind関数でサーバーが500(Internal Server Error)のステータスで応答した【非公開
-
[解決済み】「X-Frame-Options」を「SAMEORIGIN」に設定したため、フレームでの表示を拒否された。
-
[解決済み】エラー。Ionic使用中にモジュール '../lib/utils/unsupported.js' が見つかりませんでした。
-
jq は html ページとデータを動的に分割する。
-
[解決済み】HTML5キャンバスの画像サイズを変更する
-
[解決済み] <canvas> を拡大縮小する際に補間を無効にする