HTML5でWeb Notificationのデスクトップ通知を実装する方法
時々、デスクトップの右下に以下のようなプロンプトが表示されます。
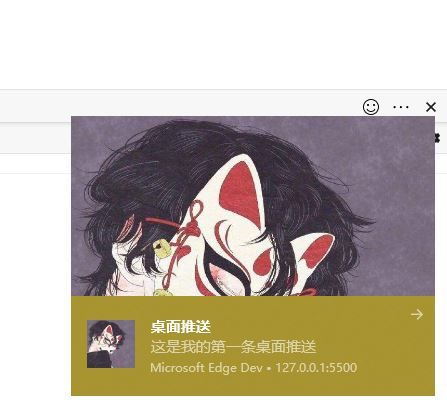
このデスクトップアラートは、HTML5に追加された新しいWeb Push Notificationの技術です。
Web Notifications技術は、ページがページの外にシステムレベルで表示される通知を送信することを可能にします。新着メールのアラート、オンラインチャットで受信したメッセージのアラートなど、ユーザーが他の作業に追われているときでも、ページからの通知を受け取ることができるため、より良いエクスペリエンスを提供することができます。
追記:IEのほか、主要なモダンブラウザはすべてこのデスクトッププッシュに基本的に対応しています。
はじめに
メッセージ通知を作成するには、次のコードで、windowオブジェクトの直下にあるNotificationクラスを使用するのが非常に簡単です。
var n = new Notification("Desktop Push", {
    icon: 'img/icon.png',
    body: 'This is my first desktop notification.' ,
    image:'img/1.jpg'
});
それで、上のスクリーンショットから、システムのデスクトップに通知がポップアップ表示されるのがわかると思います。
追記:メッセージ通知は、Webサービスを通じてこのページにアクセスした場合のみ機能します。ローカルファイルを開くために直接ダブルクリックした場合は、何の効果もありません。つまり、ファイルを開くには、ブラウザで直接ローカルファイルを開くのではなく、サーバーのフォームを使用する必要があるということです。
もちろん何も表示されない可能性もありますので、安心して読み進めてください。
基本的な構文
もちろん、上記の通知をポップアップする前に、通知の基本的な構文を理解することが必要です。
let myNotification = new Notification(title, options);
タイトル: 通知がトリガーされたときに通知ウィンドウの上部に表示される通知のタイトルを定義します。
options オブジェクトは、notification に適用される任意のカスタム設定オプションを含みます。
よく使われるオプションは
の本文です。通知の本文で、タイトルの下に表示されます。
タグを使用します。必要に応じて通知を更新、交換、削除するための各通知に類似したID。
icon: 通知を表示するためのアイコン
画像 通知本文に表示する画像のURL。
データ 通知と関連付けたい任意のデータ。これは任意のデータ型にすることができます。
renotify。新しい通知が古いものを置き換えた後、ユーザーに通知するかどうかを指定するブール値です。デフォルト値はfalseで、これは通知されないことを意味します。
requireInteraction: 通知が自動的に閉じられるのではなく、ユーザーがクリックするか閉じるまで有効であるべきであることを示します。デフォルトはfalseです。
このコードを実行すると、ブラウザは以下のように、メッセージ通知の表示を許可するかどうかをユーザーに尋ねます。
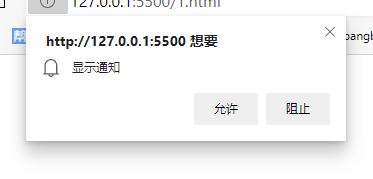
通知は、ユーザーが通知を許可する[許可]をクリックした場合にのみ表示されます。
<強い 承認
ユーザーが"Allow"と"Block"をクリックしたかどうかを知るにはどうすればよいですか?
ウィンドウのNotificationインスタンスには、ユーザーの認証状態を取得するためのrequestPermission関数があります。
// First, we check if we have permission to display the notification
  // If not, we request permission
  if (window.Notification && Notification.permission ! == "granted") {
      Notification.requestPermission(function (status) {
      //status is the authorization status.
      // If the user clicked allowed, status is 'granted'
      // if the user clicked forbidden, then status is 'denied'

      // This will allow us to use Notification.permission in Chrome/Safari
      if (Notification.permission ! == status) {
        Notification.permission = status;
      }
    });
  }
注:ユーザーが認証の右上にある閉じるボタンをクリックした場合、statusの値はデフォルトになります。
後は、statusの値がgrandfulかどうかを判断して、通知を表示するかどうか決めるだけです。
通知イベント
しかし、単にメッセージボックスを表示するだけでは魅力がありません。そこで、メッセージの表示前後にイベントが発生するような、ある程度インタラクティブなメッセージ通知が必要です。
Notificationは、開発者がユーザーとのインタラクションを非常に効率的に処理するために使用できるイベント関数のセットで始まります。
onshow , onclick , onerror , onclose があります。
var n = new Notification("Desktop Push", {
    icon: 'img/icon.png',
    body: 'This is my first desktop notification.'
});
//onshow function is triggered when the message box is displayed
//can do some data logging and close the message box at regular intervals, etc.
n.onshow = function() {
    console.log('Showing the message box');
    //close the message box after 5 seconds
    setTimeout(function() {
        n.close();
    }, 3000);
};
//called when the message box is clicked
//you can open the relevant view and close the message box at the same time, etc.
n.onclick = function() {
    console.log('clicked the message box');
    // open the related view
    n.close();
};
// the onerror function will be called when an error occurs
// If there is no granted authorization, the onerror function will also be executed when an instance of the Notification object is created
n.onerror = function() {
    console.log('Message box error');
    // do something else
};
// The onclose function is called when a message box is closed
n.onclose = function() {
    console.log('Close message box');
    //do something else
};
簡単な例
<!DOCTYPE html>
<html lang="en">
  <head>
    <meta charset="UTF-8" />
    <title>Document</title>
  </head>
  <body>
    <button>Click to launch notification</button>
  </body>
  <script>
    window.addEventListener("load", function() {
      // First, let's check if we have permission to send notifications
      // If not, we'll request permission
      if (window.Notification && Notification.permission ! == "granted") {
        Notification.requestPermission(function(status) {
          if (Notification.permission ! == status) {
            Notification.permission = status;
          }
        });
      }
      var button = document.getElementsByTagName("button")[0];
      button.addEventListener("click", function() {
        // Create a notification if the user agrees
        if (window.Notification && Notification.permission === "granted") {
          var n = new Notification("Hi! ");
        }
        // If the user did not choose whether to show notifications
        // Note: Because we can't determine if the permission property has a value in Chrome, the
        // it is not safe to check if the value of this property is "default".
        else if (window.Notification && Notification.permission ! == "denied") {
          Notification.requestPermission(function(status) {
            if (Notification.permission ! == status) {
              Notification.permission = status;
            }
            // If the user has agreed
            if (status === "granted") {
              var n = new Notification("Hi!");
            }
            // Otherwise, we can concede to use the regular modal alert
            else {
              alert("Hi!");
            }
          });
        }
        // If the user refuses to accept the notification
        else {
          // We can concede the use of the regular modal alert
          alert("Hi! ");
        }
      });
    });
  </script>
</html>
インターフェースを開くと、認証要求がポップアップ表示されます。「許可」をクリックし、デスクトップに通知を送信するボタンをクリックすると、デスクトップの右下にこの通知が表示されます。

上記では、メッセージを表示しているだけです。
if (status === "granted") {
  var n = new Notification("Hi");
}
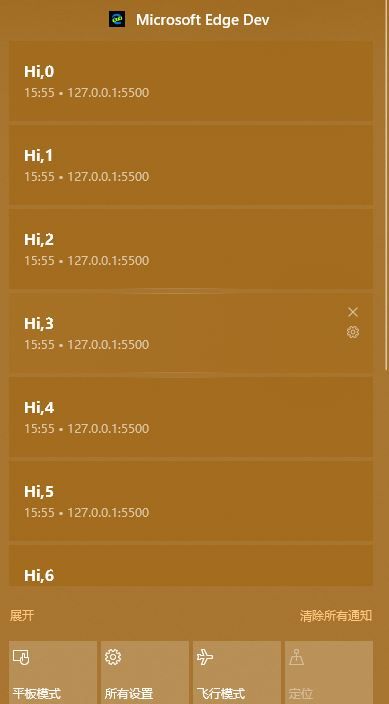
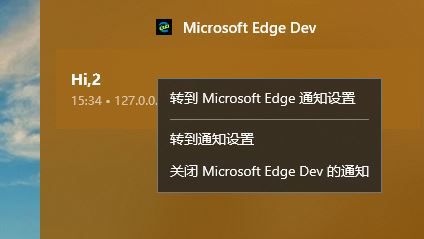
例えばメッセージが大量にある場合、forループを使って大量の通知をシミュレートしています。
for(var i=0; i<10; i++) {
    var n = new Notification("Hi,"+i);
}
10個の通知がすべて表示されていることがわかります。しかし、場合によっては、多数の通知を表示するのはユーザーにとって苦痛になることがあります。
例えば、インスタントメッセージングアプリが、メッセージの着信をすべてユーザーに通知する場合です。何百もの不要な通知がユーザーのデスクトップに広がるのを避けるために、保留中のメッセージのキューを引き継ぐことが必要になる場合があります。
したがって、新しく作成された通知にはタグが追加される必要があります。
もし、前の通知と同じタグを持つ新しい通知があれば、この新しい通知は前の通知を置き換え、最後に最新の通知だけがデスクトップに表示されます。
ここでも、トリガー通知にtag属性を追加するだけです。
for (var i = 0; i < 10; i++) {
   // Finally only see the notification with the content "Hi! 9"
    var n = new Notification("Hi! " + i, {tag: 'soManyNotification'});
}
最後に
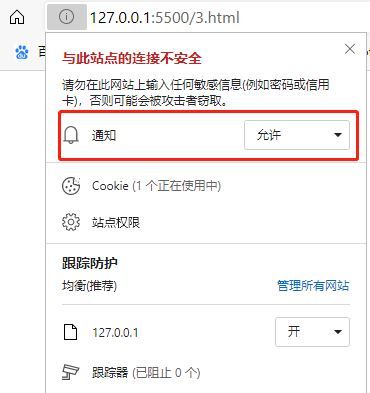
メッセージ通知機能はいい機能ですが、一部のサイトが悪意を持ってこの機能を使い、ユーザーが一度許可したメッセージを時々押して、ユーザーの作業を邪魔する可能性も否定できないので、サイトの許可を外してメッセージ通知機能を無効化することができます。
ブラウザのアドレス入力ボックスの左側にある感嘆符をクリックすると、通知のオプションがあり、認証を修正することができるんだ。または、[通知]ページで通知を修正するオプションもあり、ケースバイケースで認可の通知を修正することができます。
というわけで、最も基本的なWeb Notificationが実装されています。
概要
以上、HTML5 Web Notificationデスクトップ通知機能実装方法を紹介しましたが、お役に立てたでしょうか、もし何か質問があれば、私にメッセージをください、私は速やかに皆さんに返信します。皆様、スクリプトハウスのホームページをよろしくお願いします。
関連
-
画像のウォーターフォールレイアウトを実現するHTML+CSS+JSのサンプルコード
-
CAPTCHAを生成するHTML5サンプルコード
-
キャンバスは、ビデオの最初のサムネイルを取得します。
-
HTML5でtitleタグに小さなアイコンを設定する方法
-
Html5は、コンテナは、画面の高さや残りの高さの適応的なレイアウトの実装を埋めることができます
-
ページ上部へのスムーズなスクロールを実現する3つの方法
-
Canvasシリーズのフィルター効果
-
モバイルウェブの画像プリロード方式について簡単に紹介します。
-
Canvas がクロスドメイン画像を導入し、toDataURL() エラーが発生する。
-
モバイルドローイングブラー問題解決におけるキャンバスの深い理解
最新
-
nginxです。[emerg] 0.0.0.0:80 への bind() に失敗しました (98: アドレスは既に使用中です)
-
htmlページでギリシャ文字を使うには
-
ピュアhtml+cssでの要素読み込み効果
-
純粋なhtml + cssで五輪を実現するサンプルコード
-
ナビゲーションバー・ドロップダウンメニューのHTML+CSSサンプルコード
-
タイピング効果を実現するピュアhtml+css
-
htmlの選択ボックスのプレースホルダー作成に関する質問
-
html css3 伸縮しない 画像表示効果
-
トップナビゲーションバーメニュー作成用HTML+CSS
-
html+css 実装 サイバーパンク風ボタン